Building a small shelf, whether for your home or for your office, is easy to do. You probably already have the tools at home to accomplish this task. If not, you can easily visit any discount tool or hardware store and purchase what you need. Here is how to build free standing shelves, along with pictures and step-by-step instructions on how to accomplish this project in a variety of woodworking environments.
How to build a shelf is a basic construction question with many various types of shelves. The idea of how to build a shelf may be puzzling to some. Many people have brought up this question on the internet, so I will provide you with my step-by-step guide about how to build a shelf.

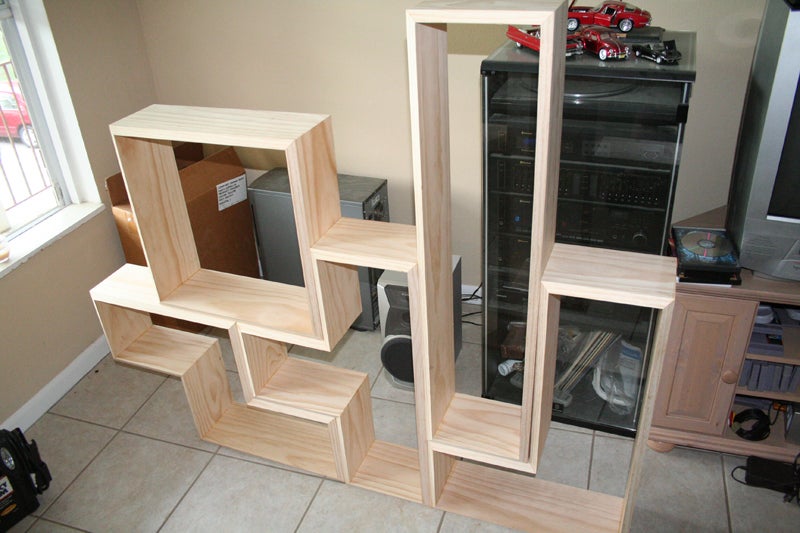
How to build a small shelf
Building free standing shelves is a great way to add storage and display space in your home. While you can purchase shelf kits from most hardware stores, it’s much more fun (and cheaper) to build your own. Here are some instructions for building a simple shelf out of wood.
Materials Needed:
1/2″ wood board (at least 2″ wide) – two pieces. Each piece needs to be at least as long as the distance between the supports on your wall. They should be at least 2 inches wide and no more than 3 inches wide. The height of your shelf will be determined by how far apart you place your supports on the wall – wider supports will give you taller shelves.
1/2″ wood board (at least 1″ wide) – one piece that is at least as long as the width of your shelf, but no more than 3 inches longer than that length. You’ll also need another piece that is at least 4 inches shorter than its width (to use as an end cap).
Building free standing shelves is a great way to add some extra storage space to your home. Whether you’re looking to create more room in your laundry room or build a shelf for your kitchen, these DIY shelf plans will help you build the perfect shelving unit.
If you are looking for a simple shelf to add some extra storage in your home, this DIY floating shelf plans tutorial might be just what you need. This floating shelf is easy to make and will look great anywhere you decide to place it!
If you have some old pallets laying around then this pallet wood shelf tutorial is perfect for you! Not only does it look stylish but it also adds extra storage space to any room in your house. Check out how to build this DIY pallet wood shelf below!

This DIY floating bookshelf plan is perfect for anyone who wants an easy project that doesn’t take up too much time or money! This tutorial includes instructions on how to make a floating bookshelf from scratch so check them out below!
This wall mounted shelf plan is perfect for anyone who needs additional storage space but doesn’t want something that takes up too much room in their home. This wall mounted shelf can be built with basic carpentry skills
Making your own shelves is a great way to save money and add your own personal touch. Here are some easy step-by-step instructions on how to build shelves that you can use to display books, collectibles, or anything else in your home.
Shelf building tips:
1) Cut the wood board to the size of the wall shelf that you have chosen. You can do this with a hand saw or a power saw. If you use a hand saw, make sure that it has a long enough blade so that you do not have to cut too many times. This will prevent splintering and tearing of the wood board.
2) Sand all surfaces of the wood board until they are smooth. You may use sandpaper or an electric sander for this process if you prefer. Sanding will help ensure a smooth finish once paint is applied later on in this project!
3) Stain the wood board using your preferred color stain. For example, if you want an antique look for your wall shelf then choose a darker stain color such as reddish brown or dark brown stain color instead of lighter colors like white or cream colored stains for example for these types of projects because they tend to give off more
Building a shelf is a great way to add some storage space to your home. Shelves are also a great way to display some of your most treasured possessions. You can build a simple shelf out of wood or go all out and create something that looks like it came straight out of an IKEA catalog.
There are many different ways to build shelves, but the most common way is by using wood and nails. If you want to get fancy, you can also use brackets or glue and screws, but they’re not necessary if you’re just looking for something that will hold up your stuff.
Step 1: Measure Your Shelf
Measure the space where you want to install the shelf and make sure there’s enough room for it. You’ll also want to measure any obstacles that might interfere with its placement, such as pipes or hanging lights. Once you have all those measurements (and know how much material you need), then it’s time for step two: shopping!
Building a shelf is an easy do-it-yourself project. A shelf can be built using either wood or metal, and it can be installed on the wall or the floor. It’s important to choose the right materials, cut them to size and secure them properly.
Materials:
2 x 4 lumber (8 feet)
Wood glue
1×4 lumber (10 feet)
Wood screws (1 1/4 inch)
How to build a wall shelf out of wood
1. To start, cut the wood into the desired shape and size using a table saw or circular saw. For this project, you’ll also want to make sure that all of your pieces are exactly the same length and width.
2. Next, use your drill to create holes for screws or nails to hold each side of your shelf together. Use a countersink bit to make sure everything is flat and level with the top surface of your wood once it’s done.
3. Then sand down each side of the shelf so that they’re smooth and ready for painting or staining!
4. The next step is optional, but recommended: Apply primer coat on both sides (front & back) of each piece of wood before applying paint/stain as an extra layer of protection against water penetration which could cause warping over time if not properly sealed first!
5. After your primer dries (usually 30 minutes), apply a few coats of paint or stain until you’re happy with the color! Don’t forget to seal those edges with either caulk or clear acrylic sealer before painting them too because they can get damaged easily if not properly sealed first
A wall shelf is a great way to organize and decorate your home. Whether you’re looking for a place to display books or as an extra surface to hold items, building these shelves is an easy project for anyone with basic woodworking skills. These shelves come in all shapes and sizes, so you can customize them to fit any space.
Cut the Lumber
Cut the 2 x 4s into three equal lengths. The length of each piece depends on how high you want your shelf to be. Once you’ve determined the length, cut them down with a circular saw or jigsaw.
Next, measure approximately 1 1/2″ from one end on each piece of 2 x 4 lumber and mark it with a pencil. This distance will vary depending on how thick your plywood is; if your plywood is 3/4″ thick, measure 3/8″ from one end of each piece of 2 x 4 lumber. If your plywood is 1/2″ thick, measure 1/2″ from one end of each piece of 2 x 4 lumber. This measurement will tell you where to drill holes for attaching the plywood later on in this project’s instructions section below
Build a wall shelf out of wood. This wooden shelf is an easy and affordable project that can be completed in an afternoon. It’s great for displaying books, accessories, or anything else you’d like to display in your home.
1. Cut the top, bottom and sides of your shelf boards to length on your miter saw or table saw.
2. Glue the top and bottom pieces together using wood glue, clamping them together as needed until they dry.
3. Sand the edges of the top and bottom pieces until they’re smooth and even with a belt sander or orbital sander.
4. Predrill pocket holes into one side of each side piece at 1/4″ from each end and every 12″ along the length of the board using a Kreg jig or drill/driver fitted with a 1/4″ bit (if you don’t have one yet, get it here).
5. Attach these side pieces to the shelf boards using 2″ wood screws driven through the pocket holes and into their ends (see photo below). Use at least three screws per joint for maximum strength; we used four screws per joint for ours because we wanted extra support for our heavy bookshelf (you might not need as many screws
When building a wall shelf, there are a few things to consider. First, you need to know what kind of materials are available to you. For example, if you want to build a freestanding shelf that can be moved around the house, it would probably be better to use wood. If you want something that is more permanent, like a built-in shelf in the kitchen, then metal might be the better choice.
Once you know what type of shelf you want to build, you need to decide how much time and effort you’re willing to put into it. If you’re just looking for an easy way to organize your home office or garage, then all you’ll need is some basic tools and supplies such as nails and screws. But if you’re looking for something with a little more style or durability, then it might be worth spending a little extra money on quality materials such as oak or walnut wood.
Finally, think about where exactly this wall shelf should go in your home. How many people will see it? Is there enough room for storage inside? What kind of style do you have in mind? These questions will help determine whether or not this project is worth doing at all — but once
To build a simple wooden wall shelf, you will need to measure the area where you want to install it. You also need to decide how high up on the wall you want your shelf and what size of wood you’re going to use for the project.
If you are using wood that has been milled at the lumber yard, then the boards will already have their dimensions listed on them. In order to cut your pieces with these dimensions, simply use a circular saw or table saw. If you are using a 2×4 or 2×6 as a piece of lumber, then these can be cut down into smaller pieces with a handsaw.
Depending on what type of look or style you want for your shelf, there are several different ways to create them:
You can make straight cuts across the entire board lengthwise in order to get smaller rectangular pieces for constructing your shelves. This is probably the easiest way and is used most often by first-time builders making shelves in their homes or apartments. It’s also very versatile in that if you have extra room left over after building your shelves, then those extra pieces can be used elsewhere around the house or apartment!
Another option is to rip the boards down the middle vertically so that they