Framing a roof for a shed is a popular DIY home repair that can be done in a few hours with the right materials. We’ll discuss why you should consider framing your roof as well as the materials that are needed to frame a roof for a shed. Framing a roof will help preserve the life of your shed.
Have you ever wanted to learn more about framing a roof for a shed? Maybe you have inherited a shed from your grandfather and wish to give it a little work, or perhaps you are new to carpentry and need something to try out your skills on. Regardless of your circumstances, this post will teach you all the basics on framing your roof.

How to build a roof frame for a shed
Whether you’re building a shed or a small house, framing the roof is one of the most important steps in construction. Roof framing requires more precision than other parts of a building. It’s also more complicated because there are several different ways to create a roof frame.
What Is Roof Framing
Roof framing involves creating a structure that supports the roof and walls of your home. This structure includes beams, joists, rafters and trusses. When you build a shed, this structure is typically made from 2x4s or 2x6s, though some builders prefer tongue-and-groove plywood instead. The size and shape of your shed will determine how much framing you need to buy or make.
When you’re framing a shed roof, a few simple tools and materials will get the job done. You’ll need to frame a small shed roof with 2x4s and plywood, but if you have access to 2x6s or larger, use them instead. The extra width will help keep your walls straight and level as you construct them.
Sheds come in many different sizes, shapes and styles. Some are large enough for you to stand up in while others are more like tiny cabins. No matter what kind of shed you want to build, the basic principles of framing remain the same.
The most important thing when building any type of structure is making sure that it is structurally sound. For example, if you wanted to build a simple shed from scratch with no plans whatsoever, how would you go about it? Would it fall down when it rains? Or is it strong enough to hold up against high winds?
The answer lies in knowing how to frame a roof correctly! It’s not as easy as nailing 2x4s together and calling it good enough; there’s actually quite a bit more work involved than that!

How to frame a roof for a shed
Building a shed is a great way to add storage space to your property. It can also be used as an outdoor workspace, or even as an extra room for guests.
The first step in building a shed is framing the structure. If you’re looking at building a small shed, this will involve putting up walls and roof trusses. This guide will show you how to frame the roof trusses of your shed so that they are sturdy and durable.
If you want to learn more about building sheds, read our guide on how to build a small shed.
Materials needed:
Nails
Hammer (optional)
A shed roof is a simple structure, and it’s easy to build one yourself. Before you start framing your shed, however, it’s important to decide on the type of roofing material you want.
Wooden sheds can be covered with several types of materials. The main ones are:
Asphalt shingle
Metal (aluminum) shingle
Clay tile
Concrete tile
The first step in framing a shed is to build a floor. This can be done with 2x4s or 2x6s, depending on your needs. If the shed will have a lot of weight in it, such as lawn equipment, then you may want to use 2x6s. If not, then 2x4s will suffice.
Start by cutting some 2x4s for the sides of your shed and screw them together at the corners using deck screws. Then cut more pieces for the front and back of the floor and screw them into place so that they are flush with each other on all sides. You can also add cross bracing between these pieces if you wish, but it isn’t necessary unless your building site is very uneven or rocky.
Framing a Roof for a Shed
A shed is a great addition to any backyard. It offers some much needed storage space, as well as an extra bit of privacy and security. When building your own shed, you can customize it to fit your specific needs. The framing of your shed will determine how strong it is and how long it will last. Here are some tips for framing a roof for your shed:
For a small shed, you can use two-by-fours or larger lumber to frame the roof. For larger sheds, you may need to use dimensional lumber such as 2x12s or 4x12s. These pieces should be cut so that they fit together easily without any gaps between them in order to create the strongest structure possible.
The easiest way to make sure that your lumber fits together properly is by using a chalk line or chalk square tool when measuring out the sizes needed for each piece of lumber needed in order to frame the roof properly. You’ll also need nails or screws (depending on whether or not you’re using dimensional lumber) in order to secure each piece of lumber together into place once they’ve been cut down into smaller pieces with saws such as circular saws or table saws
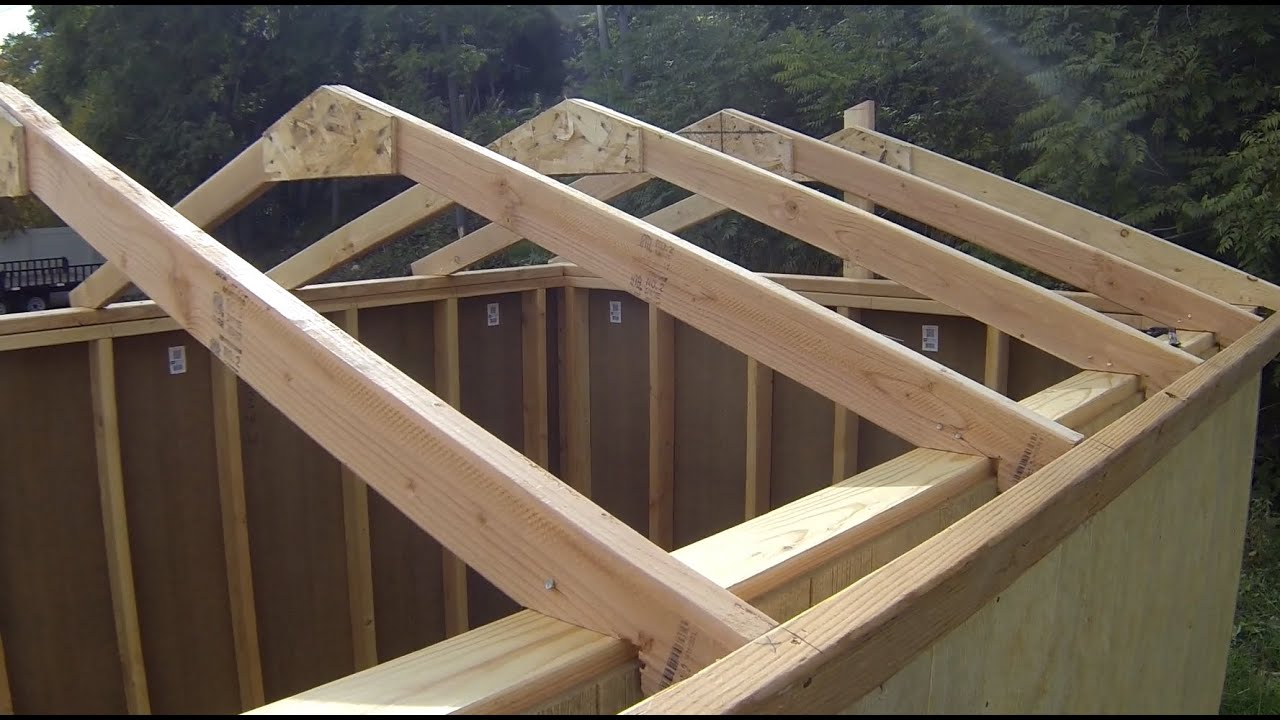
The first step in framing a shed roof is to build the rafters. The rafters are the main structural members of the roof and they support the rest of the structure. The rafter design depends on how you want your shed to look, what materials you have available and whether you want to use a ridge board or not.
In this article we’ll show you some examples of how to frame a shed roof using different types of lumber, from 2x4s to 2x12s. These framing plans will give you an idea of what goes into building a shed roof and how to frame it properly for maximum strength and durability.
How to frame a shed roof with 2x4s:
Building with 2x4s is one of the most popular methods for framing small sheds because it’s simple, easy and inexpensive. But before you begin building with 2x4s, make sure that the beams are perfectly squared so that everything lines up perfectly when it’s time for installation.
The roof of your shed is an integral part of the structure, and deserves just as much thought and planning as the walls.
To get started, you’ll need to decide on several factors. For example, do you want to use wood or metal for the framing? Do you want the roof to be flat or pitched? Will the shed have a gable end or lean-to design?
There are many different ways to frame a shed roof, but one of the easiest and most common is called rafter framing. It’s also known as “balloon” framing because each rafter resembles a long balloon shape.
How Rafter Framing Works
When building with rafters, they are set on edge against each other, which creates a sloping surface from one end of the building to another. The rafters create support for the walls and help hold up any insulation or siding on top of them. They also provide support for any overhangs above doors and windows that could otherwise sag if left unsupported.
Step 1: Create the rafters.
Step 2: Install the rafters.
Step 3: Add roof decking.
Step 4: Install roof vents and flashing.
Step 5: Install the door header and trimmers (optional).
Step 6: Finishing touches for a shed roof frame.
A shed is a great way to add extra storage space to your home. It’s also easy to build your own shed using simple tools and materials you can find at any hardware store.
Building a shed roof is similar to building any other type of roof, but there are a few extra things you’ll need to consider.
Before you get started, it’s important that you have all the tools and materials needed to complete the project. This includes:
Framing square
Hammer or nail gun
Screw gun with screws
Level and tape measure
2-by-4s (the number will vary depending on how large your shed is)